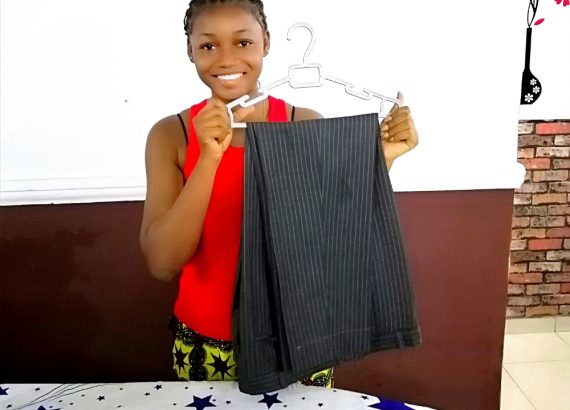
I grew up watching my dad iron his pants on our big center table. I remember he always creased his pants by laying them lengthwise on the table, neatly folded or flipped one leg of the pants up and pressed the leg underneath. You see, I learned how to iron pants from him and from time to time I iron and crease my husband’s trousers.
Many men do not iron or crease their trousers because they simply don’t know how to do so. But you can save yourself some money if you actually know how to do your own ironing. As someone who is pretty frugal, I like to do this kind of chore myself. If you are one of such men or women who don’t know how to iron or add crease to their pants, I hope you find this post helpful. You can also check out this my other DIY post on how to remove slime from clothes and carpets.
To get creases and folds on your pant demands that you have to iron them regularly or before each wear especially if the pant is made of materials like cotton, wool, or even denim. And if you want to look smart and confident in your outfit, you need to do your ironing before stepping out.
Ironing a pair of pants takes a certain process. First, you will need an ironing board, an old towel or large fabric to lay on the board, water and an iron. Then set the iron to the correct temperature using the temperature control. However, before you begin to iron, make sure you read the label attached to the back of the pant to see if you can iron it. Some designer do include ironing instructions along with washing instructions with the size to enable the user handle the fabric with care. Never you ignore the instructions.
How to Iron Pants
1. Lay the towel on the Ironing Board.
I have discovered that laying an extra material preferably cotton on the board makes ironing easy. Fold the old towel or bedsheet into two or four depending on how long it is for that extra thickness. Lay the sheet on the iron and spread your hands on it to smoothen the edges.
2. Read the Label.
Check out the label on the trousers to see what ironing instructions have been written for you. The ironing instructions will enable you set the iron to the proper temperature.
3. Plug in the Iron.
To begin ironing, plug in the iron and wait for it to get hot. If there is a water reservoir, fill it with clean water before turning on the iron. For iron that comes without a water reservoir, fill a spray bottle with water so that you can spray the pants before ironing.
4. Iron the Pockets
Most people iron their pants without touching the pockets. As a result, the pockets becomes severely wrinkled. To prevent this from happening, start by ironing the pockets of your trousers. Turn your trousers inside out and smoothen out the lining by pressing your iron gently on the pockets’ lining.
5. Iron the waistband and Top part of the Pants
Once you have finished ironing the pockets, turn the pants back to the front and iron the wrinkles out of the waistband areas. Iron the wrinkles out of the side pockets, flaps and zipper area. Turn your pants over to the back and iron the wrinkles there also.
6. Line up the Seams and Iron the Creases at the Bottom of the Trousers
If you wish to iron in crease in your trousers, lay the trousers or pants flat on the ironing board with one leg lying flat on top of the other. Look inside the bottom of each leg to find the seam if the original crease is not visible. Smoothen the hem out with your palm while holding the seams together. Flip one leg of the pants up and carefully arrange the other leg on the board in a way that one vertical inseam is lying on top of the other inseam. Now sprinkle water on the crease and press with the iron.
7. Iron the Crease at the top of the Pants

After you must have ironed the crease at the bottom, move to the top. The top of the crease should be a few inch below the waistband of your trousers. Lay the pants on the board with one of the vertical inseam on top the other. Sprinkle the edges with water and iron the crease.
8. Iron the front and back Creases
Press the iron on the front crease and move down gently to the trouser cuff or hem. Turn the trousers over on the back and repeat the same process for the back crease which is opposite the front crease. Gently press the iron upwards to the pockets area and move downwards to the cuff. Be careful, ensure the pants is as straight as possible to avoid ironing wrinkles into the pants. Apply pressure on the crease for best results.
For starters, creases are that sharp lines you see on trousers—suit trousers and khaki. Making creases on your trousers makes you look presentable and formal. It enhances your look.
9. Line up the seams and mark out the Crease for the other leg
Once you are done with the first leg, take the opposite leg of the trouser and repeat the process on step 7, 8 and 9.
10. Check for Wrinkles
Now that you have finished creating creases on the trousers, a good practice is to check for wrinkles that might have formed on the pants unnoticed. Iron such wrinkles to give your pants the perfect look.
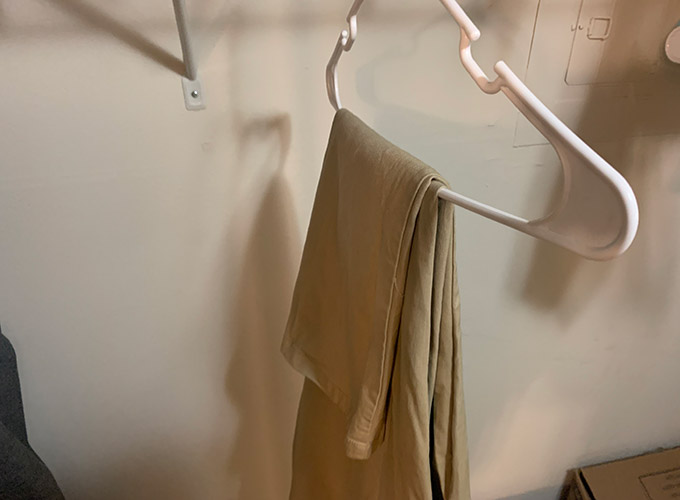
After ironing, hang your pants to prevent wrinkles. I have included two of the best known methods to hang your Pants.
10.1. Hang the Pants: The Saville Row Fold
The Saville row fold prevents your trousers from falling off the hanger. To perform the Saville row fold, you need a standard hanger. A standard hanger is the triangle-shaped hanger. Grab one leg of the trouser by the hem and straddle the hanger with the trouser leg. Then fold one leg through the hanger, letting the bottom hem hang about an inch above the crotch. Fold the other pant leg over the first and through the hanger in the opposite direction with your other hand. Straighten the pants out.
10.2. Hang your Pants: The simple Method
You also need a standard hanger for this simple method. Fold the pants in half vertically. Then slip the pants through the hanger, and drape them across the bar by the leg part so that the waistband should be touching the cuffs. Next place the hanger inside your wardrobe
Now that you have ironed and added creases to your pants, you need a clean ironed shirt. Here’s how to do it yourself.